Tuesday, November 5, 2013

A New Way to Look at Your Day

Partner teaching is wonderful in many ways- I love only teaching 2 content areas (ELA/Social Studies) but I run into some problems having two classes... especially one in the morning and one in afternoon. My morning class is focused and ready to go, engaged and eager. My afternoon class - after lunch and specials - are sluggish, tired and mentally tapped out (like me)! 

To solve this dilemma my partner teacher and I brainstormed several ways to fight the "afternoon slumps" we were facing. One idea we came up with, tried, and FELL IN LOVE WITH is having all our small group time in the afternoon. This works so beautifully for us because we teach BOTH of our whole classes in the morning - 1 and a half hours each and then go to lunch, specials and come back and do mega small groups. Here is a look at what my schedule looked like before and after we began our mega small groups. 

My Homeroom: BLUE CLASS  
   Second Class: GREEN CLASS

OLD SCHEDULE:
7:30-8:00~ Blue Class comes in, puts away their backpacks and gathers their materials and goes to math. Green class comes in, eats breakfast, does warm-up, restroom. Announcements.
8:00-9:15~ Whole Class teach Green Class. 
9:20-10:20~ Small Group time with Green Class. 
10:20-10:25~ Clean up/Restroom/Switch Classes 
10:35-10:55~ RECESS
11:05-11:35~ LUNCH
11:45-12:45~ SPECIALS/CONFERENCE
12:50-1:55~ Whole Class teach Blue Class. 
1:55-2:50~ Small Group time with Blue Class.
2:55-3:10~ Pick Up/Pack Up/Get ready to go home. 

NEW SCHEDULE:
7:30-8:00~ Blue Class comes in, puts away their backpacks and gathers their materials and goes to math. Green class comes in eats breakfast, does warm-up, restroom. Announcements.
8:00-9:30~ Whole Class teach Green Class. 
9:30-9:35~ Clean Up/Restroom/Switch Classes
9:30-11:00~ Whole Class teach Blue Class. 
11:05-11:35~ LUNCH
11:45-12:45~ SPECIALS/CONFERENCE
12:50-2:30~ SMALL GROUP/Workshop time 
2:30-2:35~ Clean up/Go back to homeroom
2:35-2:50~ RECESS
2:55-3:10~ Pick Up/Pack Up/Get ready to go home.


The way we work our small groups is with six 15 minute rotations each day. We had to schedule each student for each rotation, each day something different so they don't get bored (and we won't have to recreate them every other few weeks!) Each child has 3 rotations of math focus activities in the math class class and 3 rotations of reading focus in the reading class. When they are scheduled to meet with us their schedule says "Meet with Mrs. Teel" and that tells them to come to my small group table. We also scheduled in our specialists (math and reading). They meet with them for 30 minutes - so rotations 1 & 2 a students card may say "Meet with Mrs. Castleberry" so that tells them to go to her for those 2 rotations.

The kids have to be responsible. They HAVE to know where to go and what to do without needing the teachers help. I think is was best that we started this at the end of the 1st 9 weeks. That way we had to first 8 weeks to teach them what are stations are and the expectations while they are there. It helped make the transition into this new routine seamless and relatively painless. The kids knew what to do and when to do it. They knew where to go and how they were expected to behave. The students were already use to do any I/C (incomplete) work before going to their stations, so that worked out easy peasy! :) 

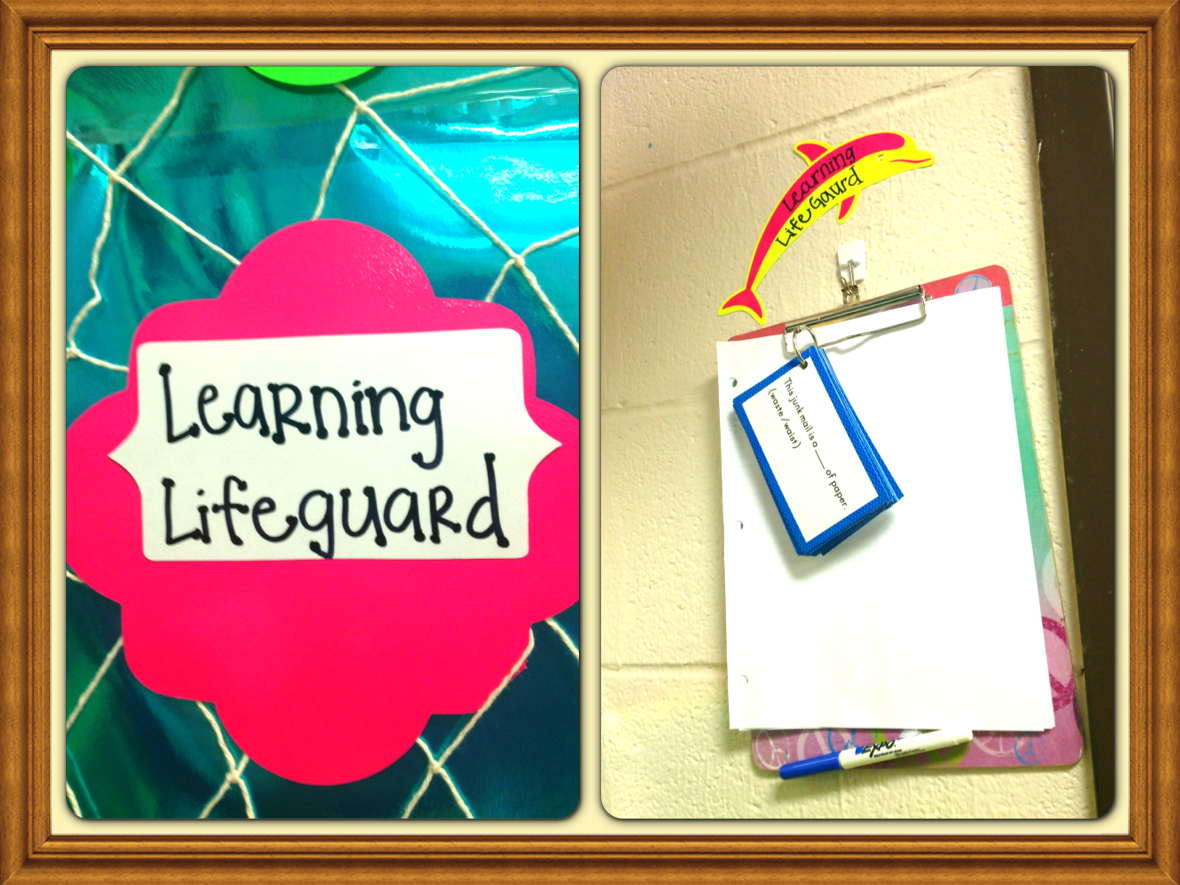
Here is a quick look at the necklace schedules that we created for each student to wear during small group time. We made them necklaces so they can wear them and not lose them!


If you have any questions about how this works or more details just leave me a comment!

I will post more pictures of this time in action soon. :)  

Happy Teaching Friends!! 

Saturday, October 5, 2013

Community and Mapping Fun!!

I blogged earlier about our first PBL -- "New School Brochure" (which ties our community and mapping lessons together) and thought I would back up and let y'all know what we did to build up to this project. 

--FIRST--
COMMUNITY- After spending the first couple weeks talking about what a community is, beginning with our own classroom community! We went over rules and procedures and how they help keep our classroom community a safe place to be. We also discussed how we each bring something special and unique to our community. 
MAPPING- At the same time we were discussing mapping. We read "Me on a Map" and created little flip books of where we are on the map, beginning with our planet and ending with our address. I asked the kids if an alien friend from another planet how would they find you? The students also created detailed maps of their homes. 

--SECOND--
COMMUNITY- We then moved on to town communities by reading "Boom Town" (a wonderful story about a family who move for the gold rush to a place with nothing and she begins making and selling pies while convincing others to open up shops like stables, banks, schools, churches....). 
MAPPING- The kids created their own town maps with streets and different businesses, schools, churches, neighborhoods and ect. On the back of their maps they had to say why that place on their map was important to have in a community. 

**This really bridged the two together and prepared them for the project**

--THIRD--
We learned about compasses. Each student got a compass and we walked around the school finding out which way the nurse's clinic faced, what direction the office was in and ect. The kids LOVED it!!!! They were so transfixed on their compasses and watching them move with each turn that they were seriously running into walls and each other!! They caught on quickly after the experienced the compasses hands-on. 

--FOURTH--
PROJECT TIME! See my PBL post: 
to learn more about how I implemented our first PBL in our classroom! 

Happy Teaching Friends!


PBL: "New to School Brochure"


Ah... our first PBL (project based learning) task. I always have a love/hate relationship with the first project. This is usually the first time they are doing a PBL where they are working in groups and have to rely on each other (a task hard for most adults to do much less 8 year olds...) and they are also use to having examples galore and struggle with the concept "this is YOUR project, if you want to use markers you can! If you want to use tape vs glue you CAN!" oh the freedom... their little brains just can't wrap around it!! BUT-- I do love seeing their smiling faces and sense of accomplishment after the first project. They are always SO SO SO proud of what they have created and I am SO SO SO proud and amazed at what they learned. It is an amazing experience. 


For this FIRST project our sweet counselor came in and presented the "problem" to the kiddos. 

PROBLEM/QUESTION- "We have many new students and families that aren't only new to our school but also new to the community. So the kids don't only know their way around their new school but also know nothing about their new town! How can we effectively let them know about our new school and our community along with a map of our school so they don't feel so nervous?"

Since this is the first project we guided them to the idea of a brochure or pamphlet with the school map on the inside with some information about our school and community on the outer flaps. 
***(Before they were presented with this problem we had been spending the past few weeks talking about our community and mapping skills.)*** 

FIRST- We went over the rubric and the expectations for their brochures and maps of the school. 

SECOND- I broke them into their groups. They created their contract while discussing how they will resolve problems that arise and how they will treat each other. The group members and I signed their contract. 

THIRD- We toured the school collecting all the information we would need for their maps. Room numbers, teacher names, the hallway numbers, the order of the rooms... ect. (This was very frustrating for the kids and we left a trail of tears down the hallways both mine and the children's...) 

FOURTH- I gave them a full sized poster board, with a blank map of the school already drawn on it. 
This wasn't originally the plan but after we had our Tour of Tears, I desperately needed to modify some -- for my own sanity!! This map they will do together and will act as the "rough draft" for their published maps on the actual brochures. 

FIFTH- the kids created their legend and compass rose. They also numbered the rooms and added the teacher names along with adding parking lots, pick up routes and whatever else they deemed important on their maps. Some added where the fish tank is while others thought the Lost and Found was an important place to know about! :) 
***This is where we are currently at in this process***
 The pink card is a "Question Card", a brilliant idea I heard about at a training this summer.
Each group gets 4 of these each time we work on the project. They have to turn in a card each time they ask ANY question, even to go to the restroom. They have to ALL agree to use the card. BEFORE we begin our work that day I answer every single question they have along with going to the restroom together, so they usually don't have to use the cards. This does put a stop to the "Can I use markers? What kind of glue am I suppose to use?" type questions quickly!  


SIXTH- Next week the kids will take their giant posters over to math class where they will add the scale (3 feet = 1 inch) to their maps. Here is where we will also throw a "twist" to the students. They will be presented with a "what if..." What if a legally blind student came and they needs to know the number of steps it took to get from one place to the next. Students will do some math by counting their steps for a bit down a hallway then predicting how many total it will take to get to the end. 

SEVENTH- Back in my classroom they will be researching the community and drafting what information they want to include in their brochures and type it out. 

EIGHTH- They will then each receive a legal sized piece of copy paper with their typed info on the flap and a blank map of the school on the inside. They will then copy what their rough draft map from the poster onto the copy paper map. Each student will receive their own map to publish. 

NINTH- I somehow copy these to create their brochures... I will probably just take their brochures to a place with a color copier and let them create the brochures! 

TENTH- Project OVER! Kids present their brochures to our counselor for our new students and families to enjoy!!! :) 

** I will add new pictures as we continue and hopefully finish smoothly!! **

ADDED FINISHED PICTURES!!


PICTURE OF RUBRIC!
Displaying 20140816_130506.jpg
RUBRIC AT THE FOLLOWING LINK:

*** This project idea came from: http://www.bie.org/tools/online_resources/pbl-online
AN AMAZING SITE with GREAT PBL ideas with complete rubrics that are in a word document so they can be easily modified to fit your kids!!***


Happy Teaching Friends!


"My Super Hero" Imaginative Story with the PLOT mountain

We love writing in room 201! We are always taking a writing piece all the way through the process --
Once we finish one, we begin another the next day! I always try to make them fun and build the kids up so they are so excited to begin. 

One thing I also do is try to always show the connection between reading and writing to the students so they can see that we are READING a book that someone WROTE. One way I do this is the week we are beginning a new writing piece, we will read a story that is in the same genre and do a story map over that book. Then later that week when we begin our new paper we use the same story map for our pre-writing. This way they see that their writing needs to include all the same parts that the book did -- strong characters, a problem and solution, a clear beginning, middle and end, an exciting plot.

One of the first papers we did this year was a superhero imaginative story. The kids learned about plot and the parts of the plot mountain. Below you can see the story maps I used. When we used these with books I just deleted the super hero pictures and title so it was just plain and could be used with any story. I teach two different classes -- both on two totally different levels. The first one is the story map I used with my lower class, much simpler. The other one I used with my higher group and has all the correct plot mountain lingo. 


**This looked alot better in Word... google drive messed it up a bit, but you get the general idea**


The day we began our paper I wore my superhero skirt and lightening bolt earring (I think I'm Ms. Frizzle...) and did an onomatopoeia mini-lesson. They were SO excited to use all the action words in their stories. 


Day one I let them choose which superhero they wanted to use for their main character. We did discuss how even though some of the super heroes resemble Super Man or The Hulk they couldn't use those names or the adventures they go on in the movies and books -- that would be plagiarism! They also began their
 pre-writing (see worksheet above) 

After pre-writing comes drafting then editing with the red pen and revising with the blue! 


After revising and editing comes PUBLISHING!
 The kids love to publish because they get to use colorful pens!!
Check out this post to read more about my colorful pens:
 http://terrificthird.blogspot.com/2013/08/third-grade-is-oceans-of-fun.html

I let them use the colorful pens to write their onomatopoeia words too!  


The paper was a success and a ton of fun!! Now it's time for a biography paper.... 

Happy Teaching Friends!! 


Friday, September 6, 2013

Already seeing STAARS!

Oh the STAAR test!!

If you teach a STAAR or state assessed grade you know how stressful it can be. You don't want to assess them to death but you want to make sure that they are mastering the skills and know their testing strategies -- especially if you teach 3rd grade, which is the first year these babies are taking the State test and are expected to bubble in their own answer key.........
and it takes a LOT of practice to master the difficult skill of bubbling!! :)

 I can't tell you how many times I have done really fun, engaging, hands on activities thinking they have it down!! -- BUT then I assessed them and they bombed it when they had to do it paper/pencil style. 

It is important that the students see it "paper/pencil" style because that is what the STAAR test is... but it is also important to have interactive lessons that the kids can get their hands on and take and do. I am BIG on project based learning and giving them some control over their own learning and how they learn it! 

Over the summer I went to a training where the speaker shared one good idea some ideas - an idea that seems like it could really help bridge hands on learning to pencil/paper assessing. 

She said that before you teach a new topic to post a question, the type of question the kids would see on the STAAR test (with the answers covered) and tell them:

"We are learning about this because you will be expected to answer a question like this..."


So, I created this Guiding Question poster that I will use to display questions in STAAR format for the kids to ponder during our lesson/activity. As you can see, I am introducing my STAAR strategies through this, which is really just an added bonus!! Afterwards, I put the answer choices up on the Elmo and we discuss what the correct answer is and how we can use what we learned during the lesson to answer the question. 

SO far it has been going really well and it provide my kids with some prior knowledge of the strategies when we did our first practice passage today! 


Two years ago when STAAR was first given, our reading specialist and I sat down, knowing that the STAAR test would be more rigorous, with more inferencing and questions that involve the students needing to "think" instead of just "remembering" we came up with the idea of using COVER UP CARDS! 
I absolutely LOVE them. The kids read the passage and when they get to the questions they use their cover-up cards to cover up the answer choices. This give the students time to really think about the question without being distracted or tempted to just choose an answer without really reading all the choices. I expect my students to write their "mental answer" above the question before they even look at the answer choices. This is useful because there usually are 2 choices that could be the answer or are "tricky ones" and it helps keep them focused on what they originally thought, keeping them from second guessing.  


Here is an example from one of my student's work from today.
You can see they highlighted their key words and did their mental answering! :)


Happy Teaching Friends!! 


Monday, September 2, 2013

Classroom Incentives

This year I am trying something different with my incentives and I am really excited about it!

Using Mel B.'s amazing coupons found HERE!!

First let me tell you the coupons are AMAZING!! I am using most of them as individual prizes the kids can cash their whammies in for along with the same old trustee prizes I just can't let go of like treasure box, special pencils, and sit where ever you want for a day. I separated the coupons into two tubs because to me some seemed more special than others like the "Get out Jail" one where the kids can take their recess back, so naturally those cost more whammies!!


The other coupons I couldn't really use individually like extra recess time, while some seemed more appropriate for whole class like dance party and eat outdoors (I just had this visual of just one kid cashing in their dance party coupon and dancing away while the rest of us just keep working... HAHA!) Anyways- the coupons that would work better whole class for me went down on this poster board and in the lamination machine. 


Then came the fun part!! I had told my students during the first week that for their whole class incentive they would earn marbles for compliments they receive in the hallways or when they are all on task. After they get so many marbles (in our case fill the little vase up) they will get to scratch off a square to reveal a certain prize! After the first week one of my classes has already filled half their vase up so I decided I better actually make this poster ASAP instead of just talking about it!! Terrible, I know!! 


So, using a "recipe" I had seen made my own scratch off paint using soap and paint. I carefully painted my squares (I didn't have any painter's tape on hand like her post so wisely recommends...) along with a little spot of yellow off to the side to test it after it dries, plugged in the fan and crossed my fingers it works! 


It did! PERFECTLY!! My kids are going to be SOO excited come tomorrow morning when they see it hanging in it new home all ready to be scratched off!! 


A part of me thinks since I laminated it any paint would of scratched off, but the soap and paint mixed helps it come off super duper easy!! 

NO Time for all that?? That is ok!
Order these scratch off stickers instead!! You can't beat 7.50!!

Using those Scratch Off stickers works just as well!!!
Read about this incentive HERE!!
Happy teaching friends!! 

First Week FUN!

I know.. I haven't blogged in what feels like FOREVER - but as all you teachers know the first few weeks leading up to the big FIRST WEEK and the first week is madness.

I don't know about you, but the first week is crazy full of expectations and do's and don't's and rushing around trying to remember when lunch is and if I am pronouncing their names correctly and if I could possibly get away with calling them "sweetie" all year long.

One thing that I have done the past few years is this twist on the popular "First Day of First Grade" pin -- the one we have all come to see and then are overcome with jealously that we don't teach first grade and "The First Day of Third Grade" or whatever grade that ISN'T first grade just doesn't sound as adorable...

I love my "3rd Day in 3rd grade" frame (which could totally be adapted to all the grade levels) and the parents do to since I make cards for them thanking them for sharing their child with me and what a great year we are going to have. I think this year I may take a 3rd day to last day of 3rd grade picture and send them both home together!


Aren't they
precious?!?!

(I also love my scuba diver door... 
It turned out way better than I had originally anticipated!!)


Happy teaching Friends!!

Thursday, August 8, 2013

Daily Five!

Daily Five -- or as I like to call it -- THE BIG FIVE!! 


The "Big Five" is such a huge part of our classroom. We do it during our "Workshop Time" where the kids are working on things they need to do while I pull my groups. I have always reserved this time for my last hour or so of our time together. Since so much of our time is dedicated to Workshop/Big Five, I have to know that it is going to good use and that the students and I are getting all we can out of it each day. 

I am such a big fan of color coding (my first class is Blue and my second is Green) so I have color coded the 5 parts of the daily five. All the labels on the door are colored accordingly.

1. Listen to Reading - Blue
2. Work on Writing - Orange
3. Read to Self - Green
4. Read to Someone - Pink
5. Work on Words - Yellow 

Even though we may not get 5 rotations done during our Workshop/Big Five time doesn't mean we aren't hitting all 5 of these each day. Everyday my students are writing, reading, and working with words before we even get to the part of our day where we are doing Workshop/Big Five! 


THE BIG FIVE DOOR 

Here is a look at how the students and I know where they are suppose to be. There are 22 "choices" (at the beginning I rotate them through, but as the year progresses and they have the procedures down and are doing exactly what is expected, we move to them choosing) because then I can decided just how many students are reading to self, reading to someone and so on. 


Since I do teach two classes there are two fish (a blue for my homeroom and green for my partner's homeroom) on each of the choices or big five spots. This way if the blue class gets to do more rotations the green class doesn't miss a spot. If one class has more students than the other, I still have 22 fish up, just a few may be our "spot holders" for any potential new students. I haven't finished putting all the fish up, but before school starts all the choices will have 1 blue and 1 green fish!! :)  


This is the Reading Resort, basically our classroom library, and where students "Read to Someone". There are 2 spots for this area on our Big Five Door at the beginning of the year, so there will be 2 people at this station reading together. By the end of the year I will have 4 spots open in our resort.


The Buddy Beach is also where students "Read to Someone". There are 2 spots for this right now on our Big Five Door. 2 students choose a big book, read it together and then fill our the story map afterwards. When done they erase the story map, choose a new big book and start over! 


The Block Barrier is where one student takes the tub of blocks back to their seat and create sentences using the blocks. I saw this on Pinterest and loved it! The kids loved it too. I will have to make new labels because they were torn up from so much use by the end of the year. 


The Listening Lagoon belongs to the "Listening to Reading" part of the daily five. Right now there are 2 spots for this on our Big Five Door. I number the two tape players so if their name is on Listening Lagoon 1, they would go to the tape player with a 1. The while tub holds all the books on tape for them to choose from. Before they start listening to another book, they have the option to go take an AR test on their previous book - if everyone who signed up at the beginning of workshop time is done. 

During the third nine weeks (STAAR panic crunch time)  I add another tape player to the Listening Lagoon and the student chooses from these activities on tape. They really like them. I like waiting since there aren't that many and they are good review for the kiddos before our big test.  I may begin adding them one at a time after I have taught the concept this year... hmm... 


Our Computer Coast houses 3 computers where 3 students are doing different things. 
On computer #1 they are "Listening to Reading" to websites like MeeGenius! (a chrome app) or  http://www.storylineonline.net/
On computer #2 they are "Reading to Self" on sites like  http://www.tumblebooks.com/ This site is really cool because it also offers quizzes after the students read. 
On computer #3 they are "Working on Words" by typing up their spelling words and then using them in a story. The kids love this because they can use different fonts and colors and make it their own. 


 Here is our most popular area, the Creator's Cove, or writing table. Here three kids come and can create anything. The masterpieces that come out of this area are amazing. Last year I had kids creating elaborate books, graphic novels, greeting cards and much  more! They were excited to come and use the different craft pieces and construction paper to bring their imagination to life. I do limit how many the kids can get of craft pieces, paper and ect... but they know if they ask nicely for more I will always say yes! 


The Techno Tide basket is where our 4 iPod devices and kindle are stored. On each iPod there are different games and activities relating to whatever part of the daily five it is focusing on. The kids LOVE all things techno and I am just so grateful to be have so much technology in my room! 


The Learning Landslide is an area where different buckets with different activities are kept. The student at that bucket gets their bucket and takes it to their seat to quietly work on. Since there are so many different stations in my classroom I only need 4 buckets, 1 student per bucket, in the Learning Landslide to have 22 spots on our Big Five Door for 22 potential students! My first year I needed like 20 buckets, so I am still in awe about how much technology has flooded into my room the past few years!! 

The activities in these buckets change frequently. I always put the easier, no directions really needed activities at the beginning of the year. I like to teach the different reading/word study/writing games during my small group time and then cycle them into the buckets as a review.  


Learning Landslide #1 is where the students "Work on Writing". The student can choose from the many different funny prompts and expand the story. The kids enjoy it the first time, but it is a bucket that is very short lived and last long enough for me to teach and rotate in some of the other writing activities! It is a good easy one to start the year off on though. 


The second Learning Landslide is apart of the "Read to Self" family and where I creep in some social studies! Here the kids have a fun puzzle they can put together of the states, then they can choose a state to research and fill out the white board. Then they can erase it and choose another state to research. I have several different puzzles (we all know how those help develop good problem solving skills) and other social studies activities to switch in. 


Learning Landslide #3 & #4 are very similar in that they are both "Work on Words" and both involve using the spelling words. In #3 they are stamping out their spelling words and words from our Word Wall. In #4 they are doing the same thing but instead of stamping, they are using magnets. At the beginning of the year these are simple and to the point. As the year progresses I will drop one of these and replace it with other word study activities. 


My last Big Five spot, and one that is VERY important is the Learning Lifeguard.
Here one student is the lifeguard, or boss, during workshop time. They get the clipboard, walk around and make sure everyone is doing what they are suppose to be doing. Certain problems that are easily missed by the teacher who is actively working with her small groups are kids drawing on the white boards instead of doing whatever they are suppose to be doing, talking about off task things at the "Read to Someone" areas instead of reading and discussing what they read... ect. 
The Learning Lifeguard makes sure everyone is on task, answers any questions anyone has and is the only one who is allowed to approach me during this time. They take their job very seriously. While they are walking around they are also practicing their homophones on the cards attached to the clipboard. :) 

Happy Teaching Friends!!