Showing posts with label project. Show all posts

Monday, November 16, 2015

THANKSGIVING around the WORLD

This year for Thanksgiving, I am having my students create their own
 "Thanksgiving Around the World Research Book"
Everything else we have done this year has been so heavily research, and "self exploring" based, why stop now just because it is the holidays?? 


In this book students will research different ways Thanksgiving is celebrated around the world. 


I created a slide for the kids to help guide them in what they need to research. 

Students will be able to record what they have learned about the celebration in any way they would like!! 
Want to do this project also?? 


Happy Teaching FRIENDS!!

Sunday, October 11, 2015

Culture Activities GALORE!!

One reason I LOVE my new teaching position as a 6th grade World Cultures teacher is because I get to explore the world with my students. It is naturally engaging and the students and I both really get into it! 

SO, since we are constantly traveling to new locations and studying their culture, I figured I would create several culture interactive notebook templates that could be ready for the students to use to record their research. 

While these activities were designed with my World Cultures class in mind, I got to thinking about how versatile these activities really are! 

When I was teaching 3rd grade ELA, these would of been PERFECT for my higher small groups to use as mini research projects. They could be used for GT/early finishers to work on when they complete their work. You could use one template to direct teach the culture of one region on a continent and allow the students to use a different template to research a different region on that continent. So many reading standards are used during these activities, from researching, reading about it, summarizing information, cause and effect of migration on the culture of a region, comparing and contrasting two regions... the list goes on!!

These activities are truly made for student self discovery. 
Just hand them a template, and let them discover about the world for themselves. 

The possibilities are endless, just like our student's curiosity about the way people live. 

Get this activity HERE!!
The first thing I created was a reference sheet for students who are doing a "self discovery" research project. This includes the terms they will be seeing on the different templates along with the definitions, guiding questions and real world examples. 

Use this template over and over again! Just write down the new location on the line!
Students can record their research on the back of the "sticks". 

Get these activities HERE!!
Next I added a few different types of recording foldables that students can use in their interactive notebooks or on a piece of construction paper and turn it into a mini project! 

The "Learning Diamond" is always a big hit with the kiddos! 

Get these activities HERE!!
I love this learning diamond that folds out to reveal the different cultural traits! Perfect for the kids to illustrate or record their discoveries of the new place they are at.

Students can create mini books of culture over different regions of the world to record their research in.
They can also keep a interesting facts list! 

Get these HERE!!
I am addicted to creating these little books in my classroom. They are so perfect for what I am teaching, since it is so heavily based on research!! 


I also created 4 Venn diagrams so students can compare and contrast two different regions. It is always fun to see just how different 2 cultures can be! The students are always shocked that not everyone is living like us!!

ALSO INCLUDED IN THE BUNDLE:


A "My Culture Traits" activity for students just learning the culture traits and how they relate to their own life. 


AND one of my top sellers, the Cultural Traits and Terms activities to use to first teach the vocabulary. This set also includes posters! 

Get this amazing bundle HERE while it is on SALE!

Saturday, October 5, 2013

PBL: "New to School Brochure"


Ah... our first PBL (project based learning) task. I always have a love/hate relationship with the first project. This is usually the first time they are doing a PBL where they are working in groups and have to rely on each other (a task hard for most adults to do much less 8 year olds...) and they are also use to having examples galore and struggle with the concept "this is YOUR project, if you want to use markers you can! If you want to use tape vs glue you CAN!" oh the freedom... their little brains just can't wrap around it!! BUT-- I do love seeing their smiling faces and sense of accomplishment after the first project. They are always SO SO SO proud of what they have created and I am SO SO SO proud and amazed at what they learned. It is an amazing experience. 


For this FIRST project our sweet counselor came in and presented the "problem" to the kiddos. 

PROBLEM/QUESTION- "We have many new students and families that aren't only new to our school but also new to the community. So the kids don't only know their way around their new school but also know nothing about their new town! How can we effectively let them know about our new school and our community along with a map of our school so they don't feel so nervous?"

Since this is the first project we guided them to the idea of a brochure or pamphlet with the school map on the inside with some information about our school and community on the outer flaps. 
***(Before they were presented with this problem we had been spending the past few weeks talking about our community and mapping skills.)*** 

FIRST- We went over the rubric and the expectations for their brochures and maps of the school. 

SECOND- I broke them into their groups. They created their contract while discussing how they will resolve problems that arise and how they will treat each other. The group members and I signed their contract. 

THIRD- We toured the school collecting all the information we would need for their maps. Room numbers, teacher names, the hallway numbers, the order of the rooms... ect. (This was very frustrating for the kids and we left a trail of tears down the hallways both mine and the children's...) 

FOURTH- I gave them a full sized poster board, with a blank map of the school already drawn on it. 
This wasn't originally the plan but after we had our Tour of Tears, I desperately needed to modify some -- for my own sanity!! This map they will do together and will act as the "rough draft" for their published maps on the actual brochures. 

FIFTH- the kids created their legend and compass rose. They also numbered the rooms and added the teacher names along with adding parking lots, pick up routes and whatever else they deemed important on their maps. Some added where the fish tank is while others thought the Lost and Found was an important place to know about! :) 
***This is where we are currently at in this process***
 The pink card is a "Question Card", a brilliant idea I heard about at a training this summer.
Each group gets 4 of these each time we work on the project. They have to turn in a card each time they ask ANY question, even to go to the restroom. They have to ALL agree to use the card. BEFORE we begin our work that day I answer every single question they have along with going to the restroom together, so they usually don't have to use the cards. This does put a stop to the "Can I use markers? What kind of glue am I suppose to use?" type questions quickly!  


SIXTH- Next week the kids will take their giant posters over to math class where they will add the scale (3 feet = 1 inch) to their maps. Here is where we will also throw a "twist" to the students. They will be presented with a "what if..." What if a legally blind student came and they needs to know the number of steps it took to get from one place to the next. Students will do some math by counting their steps for a bit down a hallway then predicting how many total it will take to get to the end. 

SEVENTH- Back in my classroom they will be researching the community and drafting what information they want to include in their brochures and type it out. 

EIGHTH- They will then each receive a legal sized piece of copy paper with their typed info on the flap and a blank map of the school on the inside. They will then copy what their rough draft map from the poster onto the copy paper map. Each student will receive their own map to publish. 

NINTH- I somehow copy these to create their brochures... I will probably just take their brochures to a place with a color copier and let them create the brochures! 

TENTH- Project OVER! Kids present their brochures to our counselor for our new students and families to enjoy!!! :) 

** I will add new pictures as we continue and hopefully finish smoothly!! **

ADDED FINISHED PICTURES!!


PICTURE OF RUBRIC!
Displaying 20140816_130506.jpg
RUBRIC AT THE FOLLOWING LINK:

*** This project idea came from: http://www.bie.org/tools/online_resources/pbl-online
AN AMAZING SITE with GREAT PBL ideas with complete rubrics that are in a word document so they can be easily modified to fit your kids!!***


Happy Teaching Friends!


Sunday, June 16, 2013

The World

I love doing project based learning with my third graders. I usually have to wait until about halfway through the year before doing "real PBL" because before then they aren't mature enough to work in groups effectively without needing constant intervention. From day 1 I begin teaching them how to work together and how to research. I usually begin with simple projects at the beginning of the year where each student is assigned a certain piece and then when they come all together to make one big project. ANYWAYS- this project I did was closer to the end of this pass year and the kids LOVED IT!! I thought it up after I did a unit on the rain forests and saw just how badly they needed a crash course on the continents! 

So after some initial lessons about continents, countries, states, regions... ect. I put my kids in 6 groups of 3-4 and gave them a blank piece of white poster board that only have the outline of their continent.  I did Antarctica as an example with the kids first so they had a gist of how to do the project. I did not want to assign Antarctica to a group because it doesn't have all the things they needed to research. After I gave each group their white poster I wrote down the items they had to RESEARCH and HAVE on their continents. 

Items needed on their continent:
1. The name of their continent somewhere BIG.
2.  The oceans labeled around their continent
3. The largest country on their continent (they could label them all)
4. Languages spoken in their continent
5. Food grown there
6. Animals and plants found there
7. Major Rivers or Lakes 
8. Famous landmarks or people found there
9. Weather/climate found there
10. Anything else they found interesting from their research.

The result was mind blowing! 


My kids seriously did fantastic. All I did was pull library books on their continents and a few of their countries and pulled up Google on 4 of my computers and Google translate on 2 others. The details they poured into their continents was more than I could ever have hoped for. Everyone was blown away at all the little details and facts. Here is a glimpse at some of them! 


We did a giant Titanic unit before this one and here the kids (North America group) drew out the sinking Titanic and the Carpathia coming to save it. They drew it right were it was suppose to be! Awesome!! 

The Africa group did a fantastic job drawing all the countries free handed! (Remember, all I gave them was the white poster board with just the continent outlined!) They also drew where the desert was in yellow. 

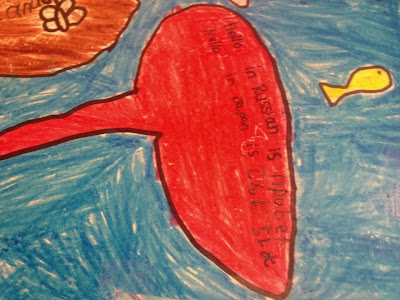
Here you can see where the kids had translated "Hello" in the languages their continent spoke. 

Here is a look at South America and their landmark. Amazing!! 


I was pleasantly surprised on how well they worked together. They automatically assigned themselves jobs as the researchers and drawers (with NO help from me) and got busy!! The only time we had an issue was when it came to coloring- when all the research was done and all was drawn out they then needed me to put out small arguments because "so and so wasn't coloring in the same direction or in the right color". I took that as them being fiercely proud of their work and just wanting it to be perfect.  

Happy Teaching Friends!!!