Showing posts with label management. Show all posts

Sunday, August 16, 2015

7 Ways to Use Tickets in YOUR Classroom


TICKETS!!
Tickets have been used in the classroom, in many different ways, for years. 
They are cheap, easy, and one roll lasts FOREVER. 
They have been time tested and work. Tickets have mainly been used for behavior management, which is a good way, a way that I use in my own personal classroom. 
But lets get creative...
Here are my top 7 best ways to use tickets in your classroom of any age or grade!!


--------

1. Bathroom Passes.
Each student gets 3-5 tickets at the beginning of the week that they write their names on and keep in their pencil bags/boxes. When they need to go the restroom, they turn in a ticket. Any leftover tickets can be turned in for a prize at the end of the week!! 

--------

2. Pairing Partners.
Using the double roll of tickets (where 2 tickets have the same number)  you can take the fights and guess work out of pairing up partners. If you have an even number of students, lets say 22, you will tear off 11 pairs of tickets and put them in a bowl. Each student will draw one ticket and then whoever has their matching number ticket is their partner! If you have an odd number of kids, lets say 23, add a ticket that is a different color or put a star on the odd ticket out and whoever draws that ticket gets to choose what pair they want to work with! 

-------

3. Question Tickets. 
When doing projects or PBLs it is common for teachers to create and use "question cards" which the kids only get a certain amount of and use them to ask questions. (Read about how I use question cards here!) 
Instead of creating and printing off and laminating these cards, just use tickets instead! 

-------

4. Who will I call on?? 
Using the double tickets, give each child one side of the ticket and you put the other in a bowl. When it is time to answer a question or to come up to the smart board to do something (my kids ALWAYS want to volunteer to come up to the board to use the pen) you can simply draw a ticket out of the bowl and call out the numbers and see who has the "winning" ticket! It will keep them engaged and on their toes!! 

-------

5.  Motivation for Assignments/Assessments.
Pass out tickets for effort, showing their work, taking their time, and making a certain grade on assignments and assessments. Students will write their names on the back of their ticket and put them in a bowl, or box, or anything! Whenever you, the teacher decided it is time, you can draw tickets for prizes.  The kids will be motivated to work their best because they will earn more tickets and raise their chances of winning awesome prizes. 
It will work best if these are special prizes, not prizes the kids already 
get for good behavior.

-------

6. Centers/Stations Assignments. 
Using double tickets, each student will get 1 ticket that will match a ticket on a center or station. 
That is where they will start for center time! Best part of this is that you could laminate the tickets that the kids get and reuse them each day! 

-------

7. Behavior Tickets. 
This one is pretty obvious, and one way I use tickets in my classroom. 
You can read all about it HERE!
Ticket container in my classroom! 


HAPPY TEACHING FRIENDS!! 

Saturday, August 16, 2014

Getting ready to INVESTIGATE another year!

I am SO excited for this coming up 2014-2015 school year! I got a new classroom (one with a WINDOW and I am SO excited!!) this classroom is smaller than my last one, but it feels more cozy. 

Our theme this year is detective/investigation. The 3rd grade team lucked out and snatched up the adorable pink panther for us. My classroom this year is completely in school theme, I went with bright chevron theme  (which you can grab at my TpT store) and with a few pink panthers scattered in there. 

Let the tour of Mrs. Teel's 2014-2015 Classroom BEGIN! 

First off, I am IN LOVE with my door this year! 
Isn't that pink panther adorable?!?! 
SO glad we got him!!


Here is the view from my door looking into my room. The sign hanging from the ceiling says "Welcome!" of course, you can purchase my pennants and have them spell out whatever you wish at 

Calendar and jobs. 
I will write each students name on the Popsicle stick and rotate them through each job on Mondays. The sticks not in the rotation will go in the Job Names pail. 

This bookshelf is to the right of my door once you walk in. It houses dictionaries, textbooks, and the trays (with labels you can get at my TpT store) is for papers from office to pass out, a tray for things to turn into office, a spot for notes from home, and the colored ones are for my 2 classes (one blue, one green) to turn in any signed failing papers. 

Pencil Sharpener station!

"KEEP CALM AND ALWAYS RETURN MY PENCILS"
hahaha! So true!!

Filing cabinet labels!!

The cabinets above my sink. Love that all my storage bins above my cabinets are all labeled and I know exactly what is in each one! 

Here is another view of my room looking at the door and that bookshelf! 

My small group table and my WINDOW!! :) 
Love my bucket seats I created. Bought the tubs from wal-mart, and turned them upside dow, cut out a circle of memory foam and hot glued the fabric down! Easy peasy. 

The shelf behind my small group table.. label CRAZY!! 


A wide shot looking from my small group table. 

My back cabinets. I really wanted a spot for all the major topics we cover in 3rd grade reading, especially the ones that are important to the STAAR test!! 

Here is my bucks system that I will put the student names on and store their behavior bucks they earn. Next to that is "Text Features" bulletin display. Text features is one thing the 3rd graders must know. I will move the pink star to the text feature poster we are studying throughout the year so the kids know which one we are focusing on. :) 


Here is the adorable Figurative Language display and the Grammar display. Again, I will move the pink star to emphasize the skill we are currently focusing on. 

Here is how I keep track of where each student is at during the writing process. 

As you can see, each of my classes (the blue class and the green class) have a numbered clip that they will move up and down the process. 

Here is a peek into one of my cabinets... I clearly went LABEL CRAZY this year!! 
But I am SO excited to be SO organized! 

 I love this arrangement for my desks. Their supply buckets stay perfectly between the desks (the bungee cords help with that) and the kids are not pushing it to each other desks.

 Just pencils in their supply buckets for now!

I am also in love with my library. I bought tubs and labeled/organized my library by genres (labels available on my TpT store also!) I LOVE my crate seats too. Turns my library into a very cozy corner. 


I made these by taking milk crates and covering them with an old green curtain I had, the memory foam, wood and covering the top with fabric. 

 The inside of the crates. Perfect for those books that don't exactly fit in with a certain genre or over flow books!

I found this adorable Book Hospital label on TpT and just fell in love!
 Of course I have my EEKK! Framed and ready to go!
 Love framing different posters.

This year I am also going to try my hand at the popular library sticks we have all seen all over pinterest! 
One for each class of course!!


A wide shot looking onto my small group area and library. 


 Here are my prefix and suffix boards you can see above the shelving.
These are available at my TpT store at:
http://www.teacherspayteachers.com/Product/Prefixes-and-Suffixes-Mini-Posters-with-Banners-1279025


My MEGA desk. I have never had such a large desk area before but so excited that all my wires are hidden and I could decorate the from of my desk with my name!! 


A shot of behind my desk. Covered an ugly board with fabric. It is so bright and cheery!


Here I will write what we are doing each day in the my reading class! 
Plus the too cute rules I found on TpT! 


My promethean board, floor space and white board. I don't have any student backs to the board, and it is where our lessons take place! 

My Blurt chart. You can read more about this behavior tool I use here:


This is the side chalkboard directly to the left of my door. Here I have this board broken into 2 parts: Writing and Reading. Each with different important skills we learn throughout the year. The pink star will be pinned to the type of writing we are currently doing. 

Here is the reading side. Again, the pink star will move next the skill we are focusing on that week! 


Next to the chalk board is a bulletin board that I have created into my genre board. I bet you can guess what I will use that pink star for huh?? :) 


I have created a working on words station next to my desk for students to spell out spelling words.
On top of the magnet desk is their turn in bucket.

 On my campus we each get 6 Chromebooks. I am so excited to use this niffy charging station I created!

 Here is that back shelving unit by my library. It holds my stations/buckets for daily five. I am missing my tape recorder for my books on tape!

 Here is my big books station for daily five. It is underneath my big whiteboard by my Promethean board.

 This is also apart of my daily five stations. I use this for creative writing.

 Also on that back shelving is my colorful pens and revising/editing pens for students to use during the writing process.

 I also have their paper stored here...

and different supplies they need during their time with me!!!


I will blog again once I have all my Daily Five stations up and running!

UNTIL THEN...

Happy Teaching Friends!!!


Thursday, August 8, 2013

Daily Five!

Daily Five -- or as I like to call it -- THE BIG FIVE!! 


The "Big Five" is such a huge part of our classroom. We do it during our "Workshop Time" where the kids are working on things they need to do while I pull my groups. I have always reserved this time for my last hour or so of our time together. Since so much of our time is dedicated to Workshop/Big Five, I have to know that it is going to good use and that the students and I are getting all we can out of it each day. 

I am such a big fan of color coding (my first class is Blue and my second is Green) so I have color coded the 5 parts of the daily five. All the labels on the door are colored accordingly.

1. Listen to Reading - Blue
2. Work on Writing - Orange
3. Read to Self - Green
4. Read to Someone - Pink
5. Work on Words - Yellow 

Even though we may not get 5 rotations done during our Workshop/Big Five time doesn't mean we aren't hitting all 5 of these each day. Everyday my students are writing, reading, and working with words before we even get to the part of our day where we are doing Workshop/Big Five! 


THE BIG FIVE DOOR 

Here is a look at how the students and I know where they are suppose to be. There are 22 "choices" (at the beginning I rotate them through, but as the year progresses and they have the procedures down and are doing exactly what is expected, we move to them choosing) because then I can decided just how many students are reading to self, reading to someone and so on. 


Since I do teach two classes there are two fish (a blue for my homeroom and green for my partner's homeroom) on each of the choices or big five spots. This way if the blue class gets to do more rotations the green class doesn't miss a spot. If one class has more students than the other, I still have 22 fish up, just a few may be our "spot holders" for any potential new students. I haven't finished putting all the fish up, but before school starts all the choices will have 1 blue and 1 green fish!! :)  


This is the Reading Resort, basically our classroom library, and where students "Read to Someone". There are 2 spots for this area on our Big Five Door at the beginning of the year, so there will be 2 people at this station reading together. By the end of the year I will have 4 spots open in our resort.


The Buddy Beach is also where students "Read to Someone". There are 2 spots for this right now on our Big Five Door. 2 students choose a big book, read it together and then fill our the story map afterwards. When done they erase the story map, choose a new big book and start over! 


The Block Barrier is where one student takes the tub of blocks back to their seat and create sentences using the blocks. I saw this on Pinterest and loved it! The kids loved it too. I will have to make new labels because they were torn up from so much use by the end of the year. 


The Listening Lagoon belongs to the "Listening to Reading" part of the daily five. Right now there are 2 spots for this on our Big Five Door. I number the two tape players so if their name is on Listening Lagoon 1, they would go to the tape player with a 1. The while tub holds all the books on tape for them to choose from. Before they start listening to another book, they have the option to go take an AR test on their previous book - if everyone who signed up at the beginning of workshop time is done. 

During the third nine weeks (STAAR panic crunch time)  I add another tape player to the Listening Lagoon and the student chooses from these activities on tape. They really like them. I like waiting since there aren't that many and they are good review for the kiddos before our big test.  I may begin adding them one at a time after I have taught the concept this year... hmm... 


Our Computer Coast houses 3 computers where 3 students are doing different things. 
On computer #1 they are "Listening to Reading" to websites like MeeGenius! (a chrome app) or  http://www.storylineonline.net/. 
On computer #2 they are "Reading to Self" on sites like  http://www.tumblebooks.com/ This site is really cool because it also offers quizzes after the students read. 
On computer #3 they are "Working on Words" by typing up their spelling words and then using them in a story. The kids love this because they can use different fonts and colors and make it their own. 


 Here is our most popular area, the Creator's Cove, or writing table. Here three kids come and can create anything. The masterpieces that come out of this area are amazing. Last year I had kids creating elaborate books, graphic novels, greeting cards and much  more! They were excited to come and use the different craft pieces and construction paper to bring their imagination to life. I do limit how many the kids can get of craft pieces, paper and ect... but they know if they ask nicely for more I will always say yes! 


The Techno Tide basket is where our 4 iPod devices and kindle are stored. On each iPod there are different games and activities relating to whatever part of the daily five it is focusing on. The kids LOVE all things techno and I am just so grateful to be have so much technology in my room! 


The Learning Landslide is an area where different buckets with different activities are kept. The student at that bucket gets their bucket and takes it to their seat to quietly work on. Since there are so many different stations in my classroom I only need 4 buckets, 1 student per bucket, in the Learning Landslide to have 22 spots on our Big Five Door for 22 potential students! My first year I needed like 20 buckets, so I am still in awe about how much technology has flooded into my room the past few years!! 

The activities in these buckets change frequently. I always put the easier, no directions really needed activities at the beginning of the year. I like to teach the different reading/word study/writing games during my small group time and then cycle them into the buckets as a review.  


Learning Landslide #1 is where the students "Work on Writing". The student can choose from the many different funny prompts and expand the story. The kids enjoy it the first time, but it is a bucket that is very short lived and last long enough for me to teach and rotate in some of the other writing activities! It is a good easy one to start the year off on though. 


The second Learning Landslide is apart of the "Read to Self" family and where I creep in some social studies! Here the kids have a fun puzzle they can put together of the states, then they can choose a state to research and fill out the white board. Then they can erase it and choose another state to research. I have several different puzzles (we all know how those help develop good problem solving skills) and other social studies activities to switch in. 


Learning Landslide #3 & #4 are very similar in that they are both "Work on Words" and both involve using the spelling words. In #3 they are stamping out their spelling words and words from our Word Wall. In #4 they are doing the same thing but instead of stamping, they are using magnets. At the beginning of the year these are simple and to the point. As the year progresses I will drop one of these and replace it with other word study activities. 


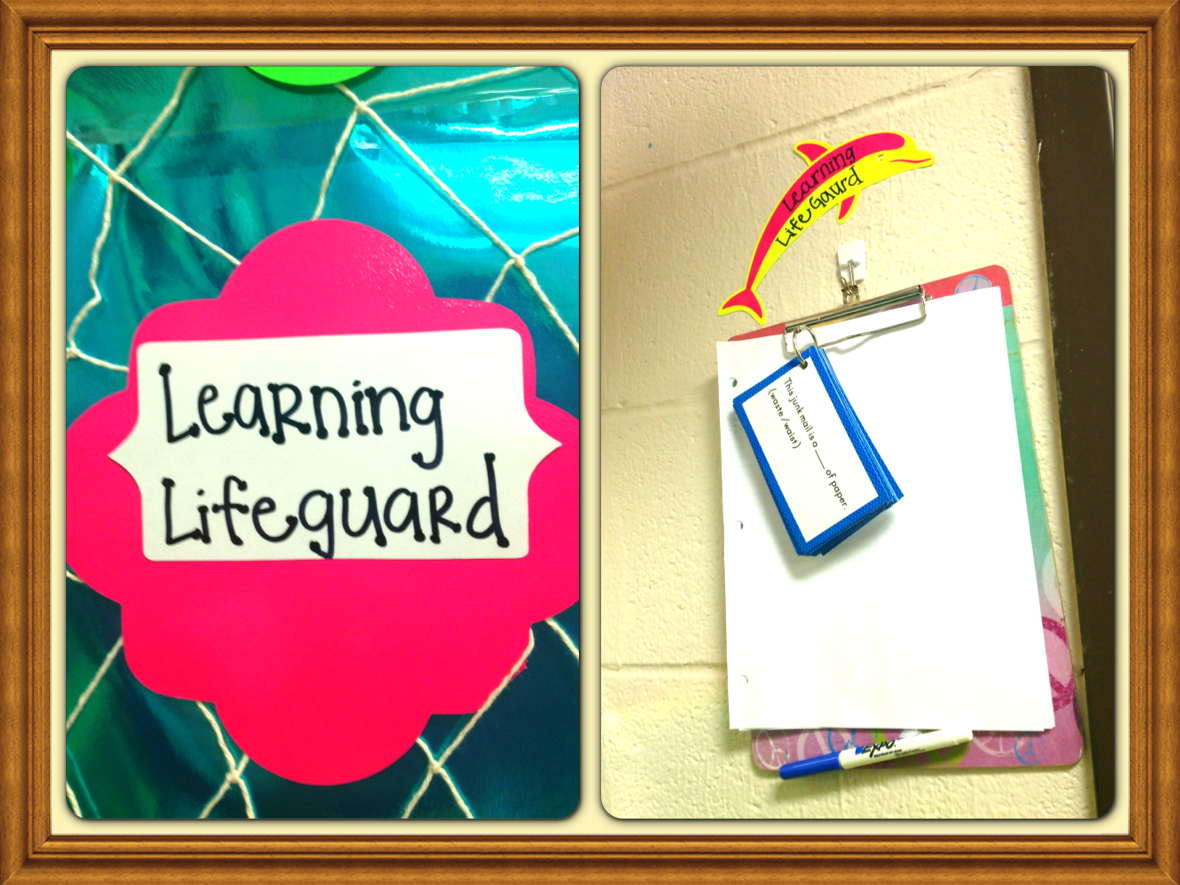
My last Big Five spot, and one that is VERY important is the Learning Lifeguard.
Here one student is the lifeguard, or boss, during workshop time. They get the clipboard, walk around and make sure everyone is doing what they are suppose to be doing. Certain problems that are easily missed by the teacher who is actively working with her small groups are kids drawing on the white boards instead of doing whatever they are suppose to be doing, talking about off task things at the "Read to Someone" areas instead of reading and discussing what they read... ect. 
The Learning Lifeguard makes sure everyone is on task, answers any questions anyone has and is the only one who is allowed to approach me during this time. They take their job very seriously. While they are walking around they are also practicing their homophones on the cards attached to the clipboard. :) 

Happy Teaching Friends!!